Freelance Contract Template for Free

Published:
How to make a freelance contract?
You’re probably here because you’ve been told time and time again that using a contract helps you get paid quicker. And it’s true. But there’s a few methods you can use to create the right contract for you. Since every freelance business has different needs you’ll always need to amend things, but to get you started we’re giving you a free template! (Click the link below to download your free template).
Whilst some agreements are made vocally, it is always better to get things in writing. Efficiency is the key here, so what better way to get contracts signed than sending them digitally?
At Signable we are all for the digital way of signing contracts and will show you what needs to be written in a Freelance contract and how to send one digitally.
Download our Freelance Contract Template Here

What should a freelance contract include?
Signing parties
To start with, it has to be clear who the parties are that are signing the contract. For this step, you will need to list the name, company name, phone number, email and address.
Description of Services
Once you know who is signing, we need to know what they’re agreeing to. You can write in the contract that you are fulfilling a service like, designing a web page or installing a bathroom. Contracts can be used for anything, from B2B to B2C and from digital to physical services. Just make sure you’ve outlined what you’re doing for them so everything is clear and disputed are quashed.
Deliverables
The deliverables are the final product of your services. In here you state clearly what you are obligated to give your client at the end of the contract duration.
Pricing and Rates
Ka-ching! Here you write, clearly, the price for your services. Include potential costs for travel and other expenses in necessary.
Payment terms and schedule
You need to give your client all the details about the payments they have to make. So the date of payment, how much and to which bank account.
Signature
The most important piece of information needed, the signature. In a digital contract, you can sign on any device. Mobile phone, tablet or desktop. Want to know how? Read on and see our step-by-step guide on how to sign a document.
Freelance contract template
If you have read the text above, you kind of get the gist of what needs to be said in a contract. This, however, does not make it easy to set a new contract up. So we got your back!
In the tutorial below we have used the same contract just to make things simple.
Download your template here
How do you sign a digital contract?
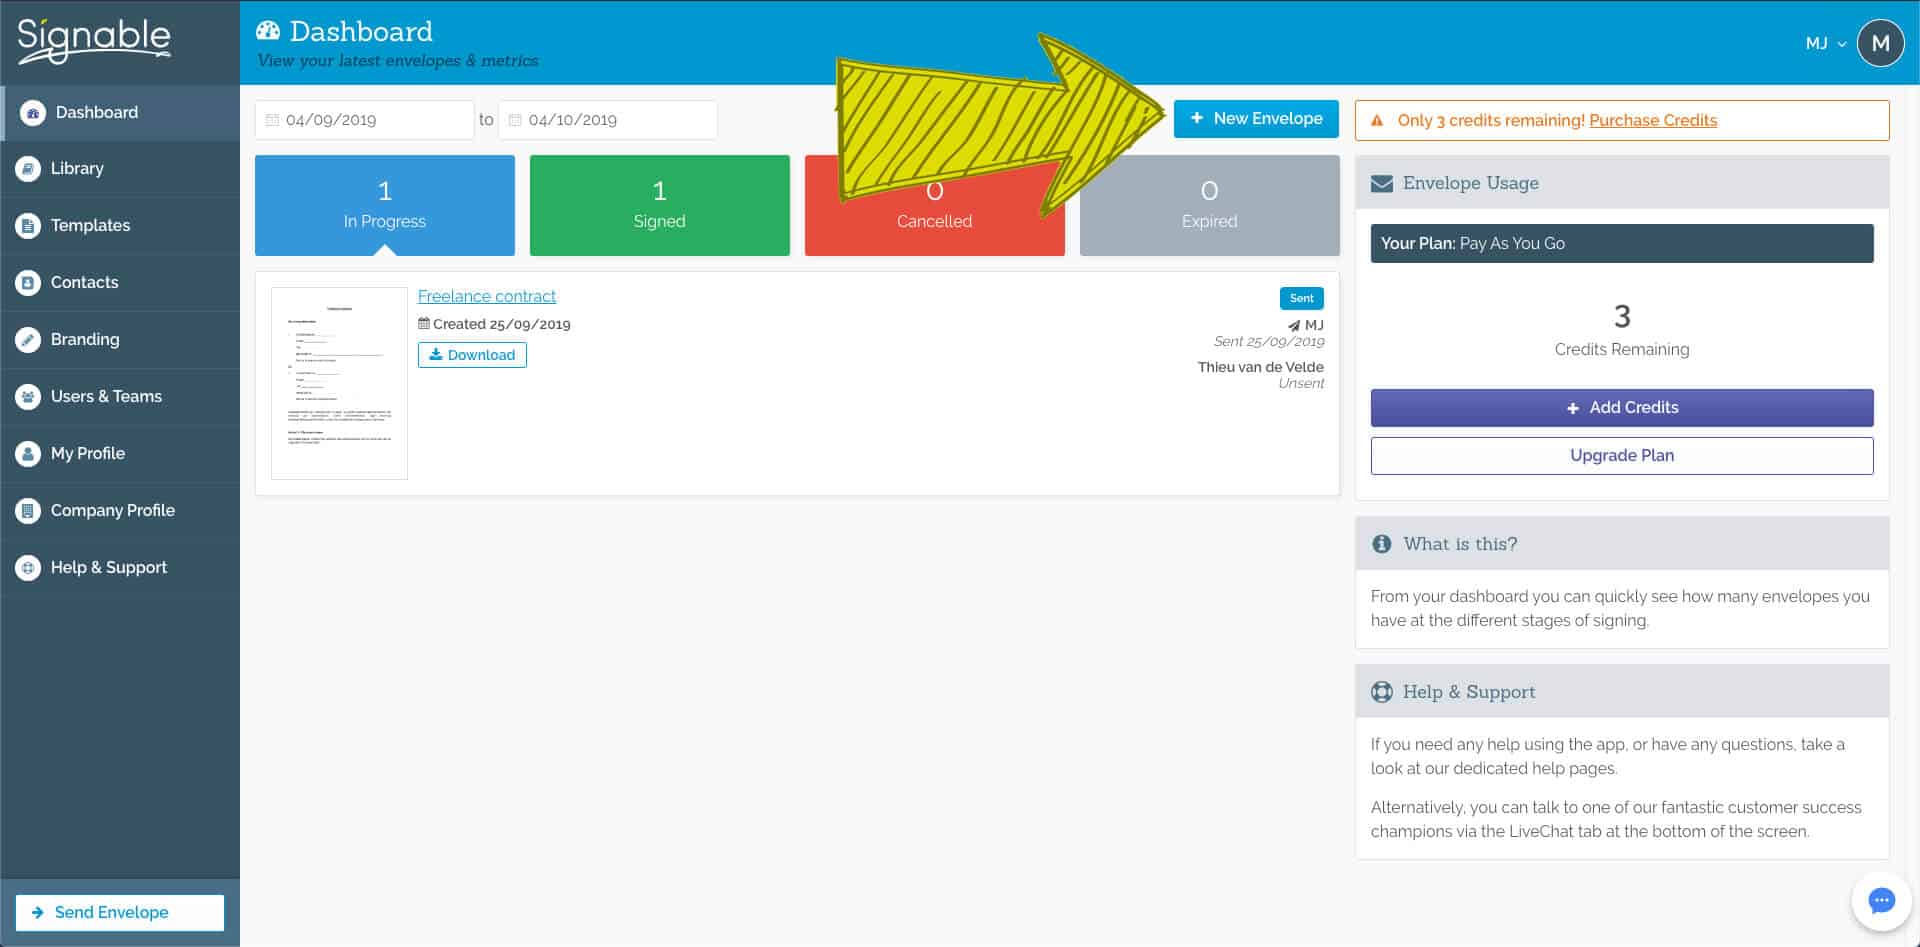
1. Click on new envelope
In this example, we start by clicking on the “+ New envelope” button. This is the blue button that you will find at the top of your dashboard. After you click on this you will be taken to a screen where you can upload your contract.
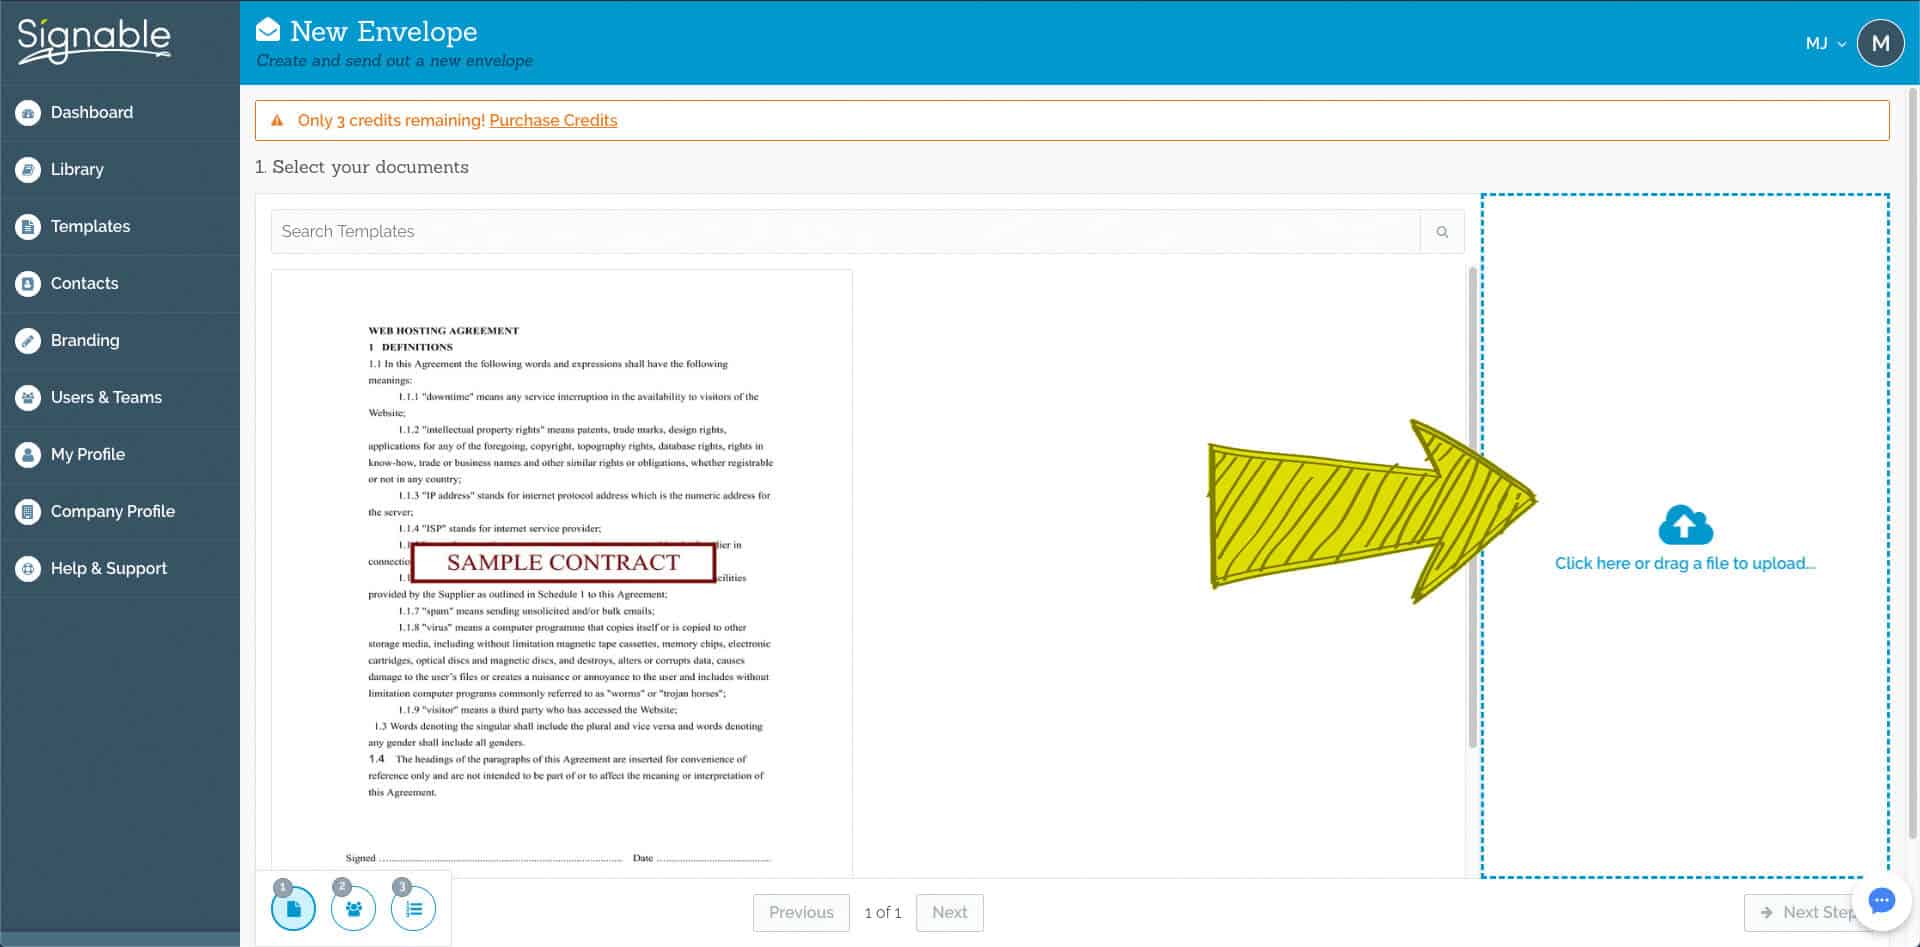
2. Upload your template
On the left side of this page you can find all your templates and if you look to the right you will find the option to add your own contracts. In this example we choose the second option. You can upload Word, Excel and PDF files here. In our example we use the Freelance contract template you have just downloaded. After you have done this we will proceed to the next step.
TIP! Keep the places that need to be filled free of text. So do not place <Home> where your contact must enter his place of residence. If this happens, the 2 texts will be mixed together and it will not be readable.
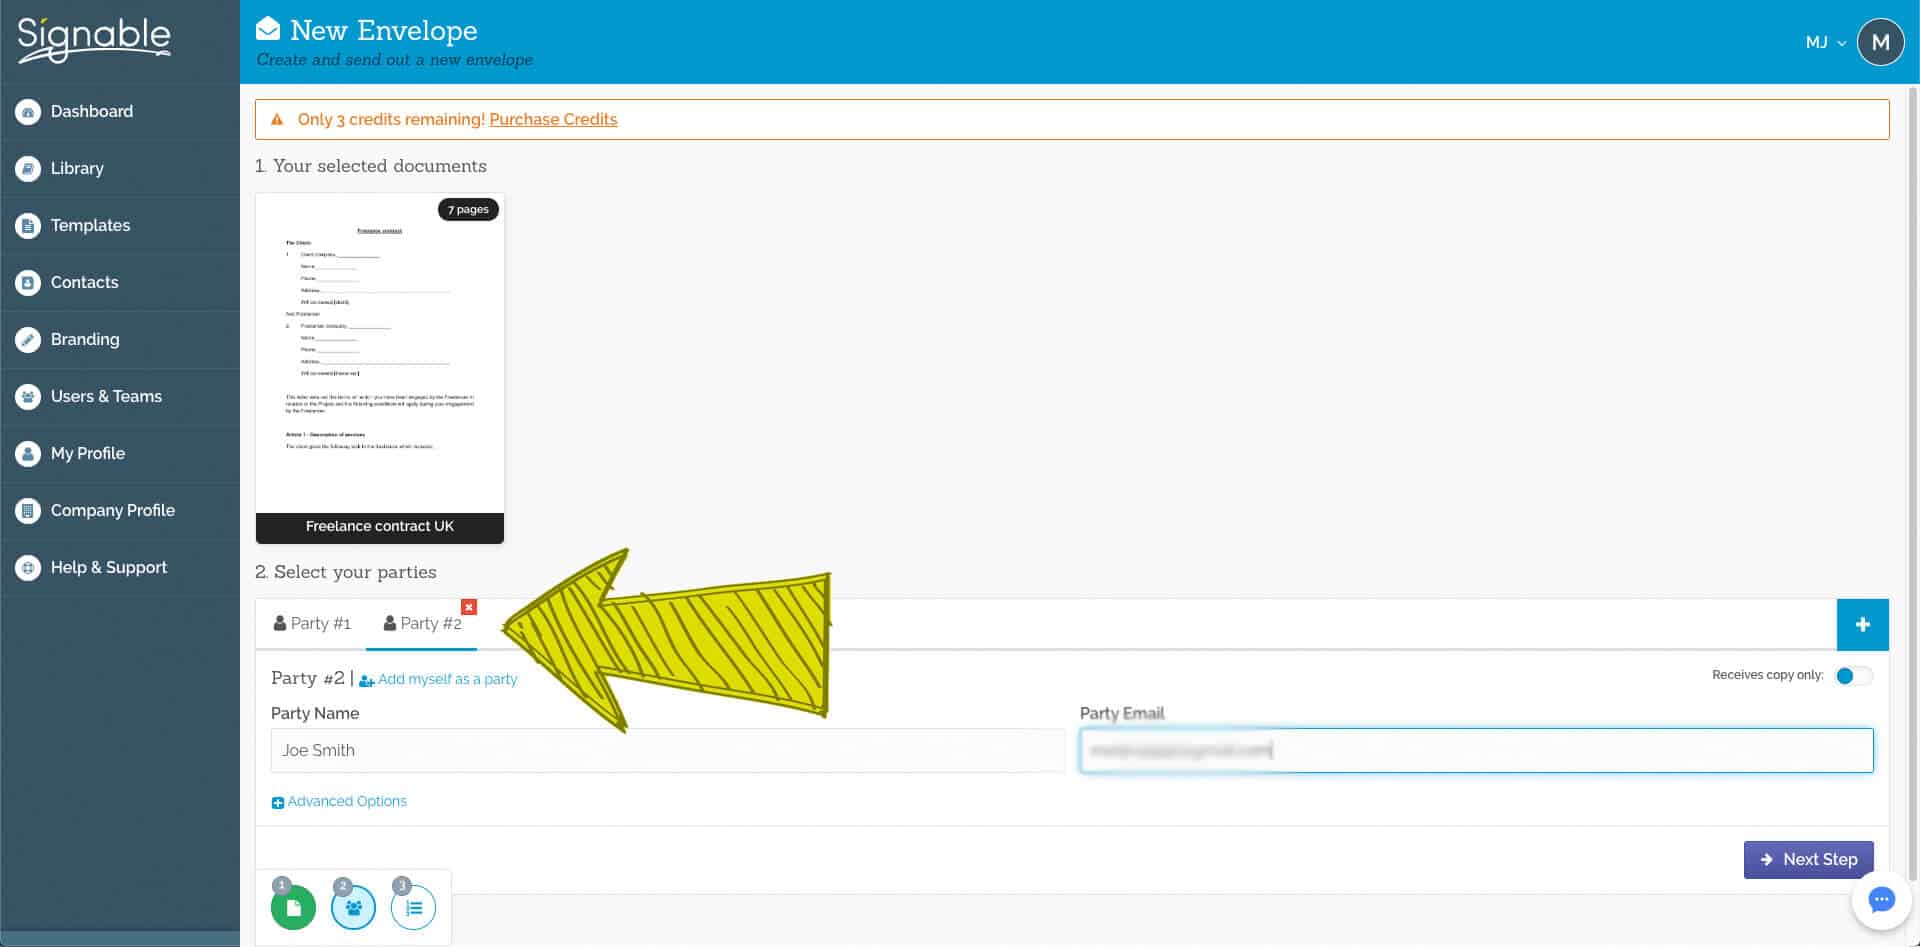
3. Add your Signers
For Party #1 you can go ahead and “Add myself as a party” as you’ll probably need to sign the contract yourself. Your contact data will be loaded automatically into the fields. For Party # 2 add your client’s info.
More than 2 people signing? No problem! On the right you see a blue button with a +, click on this to add new parties.
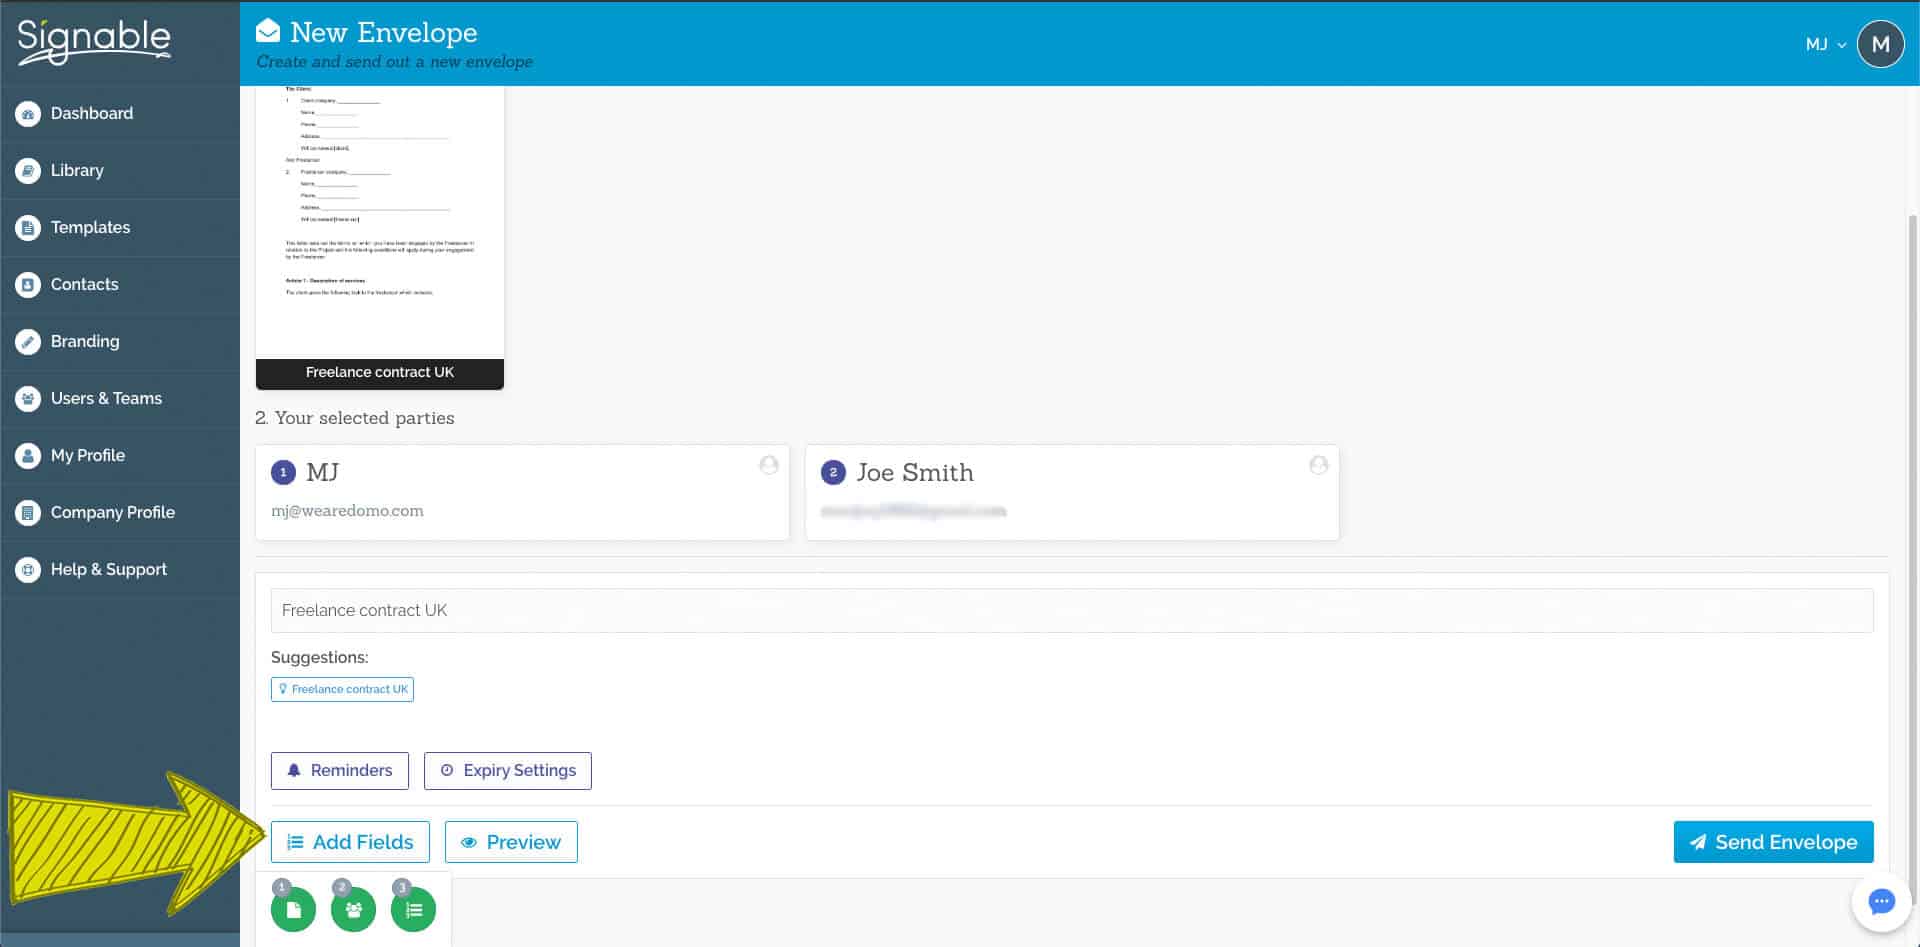
4. Add fields
Now it’s time to indicate which fields must be filled in by the client. There are several fields that our client must fill in the freelance contract template, so we’ll take you through those below.
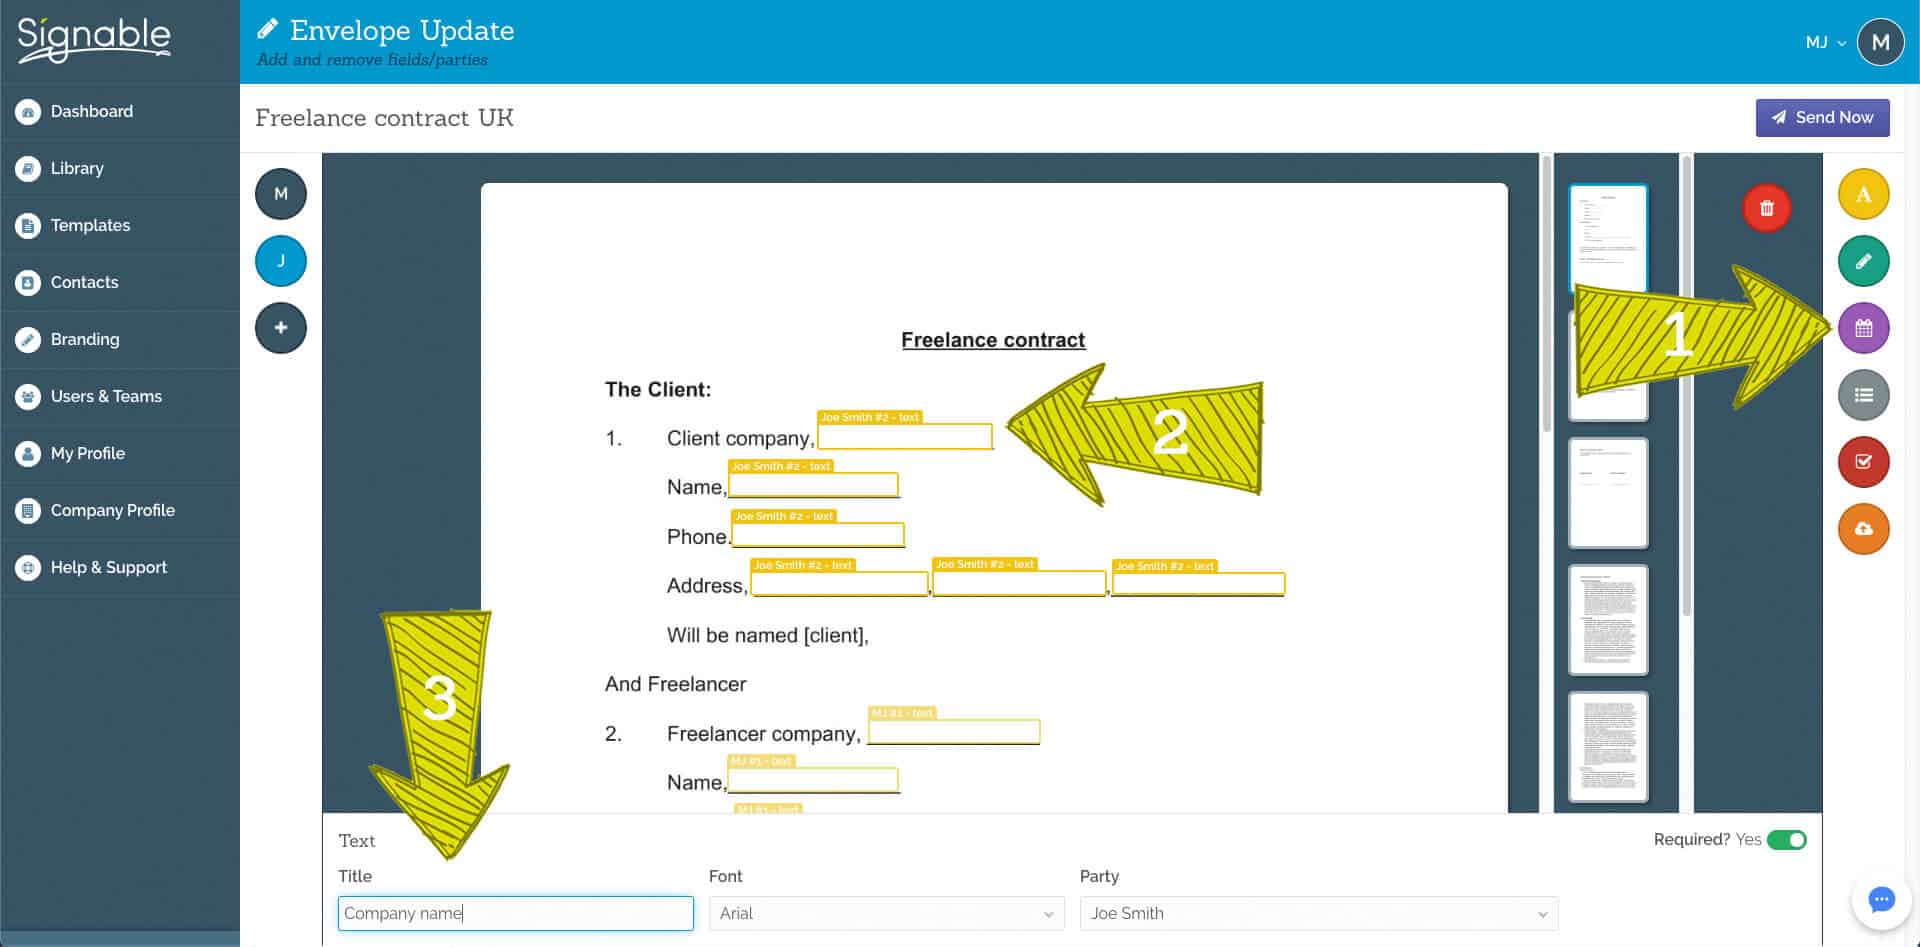
5. Define the fields
To display this step better, we have numbered the arrows.
Arrow 1 points to the different fields that you can use. These are; Text, Signature, Date, Dropdown menu and a Checkbox. There is also an upload field where, for example, a photo of ID can be uploaded.
Arrow 2 points to a text field placed on the contract. You can adjust these fields in size and placement so that they are exactly where you want them.
Arrow 3 points to the personalisation that you can add in a text field. Here you give each field a name so that your client knows what to fill in. You can also edit the font to match your brand and indicate which party must fill which field.
6. Click send
If you click Send, the document will be sent to your email first and will take you to what’s called the signing page. As soon as you have filled in your information, your client will receive an email which will take them to the signing page to fill in their info. Super clean and user-friendly!
When your client has signed everything, everyone will receive a copy of the contract and you will be ready to do business!
Congratulations!
